

This is another of my mum’s recipes that I’ve tinkered with a little. These chocolate and date crispie bars – or ‘date slices’ as they were known in our family are easy and delicious. They are perfect for lunchboxes, picnics or after-school snacks. They require very little actual cooking and are a great thing to make with children. In fact they were one of the first things I made when I was little.
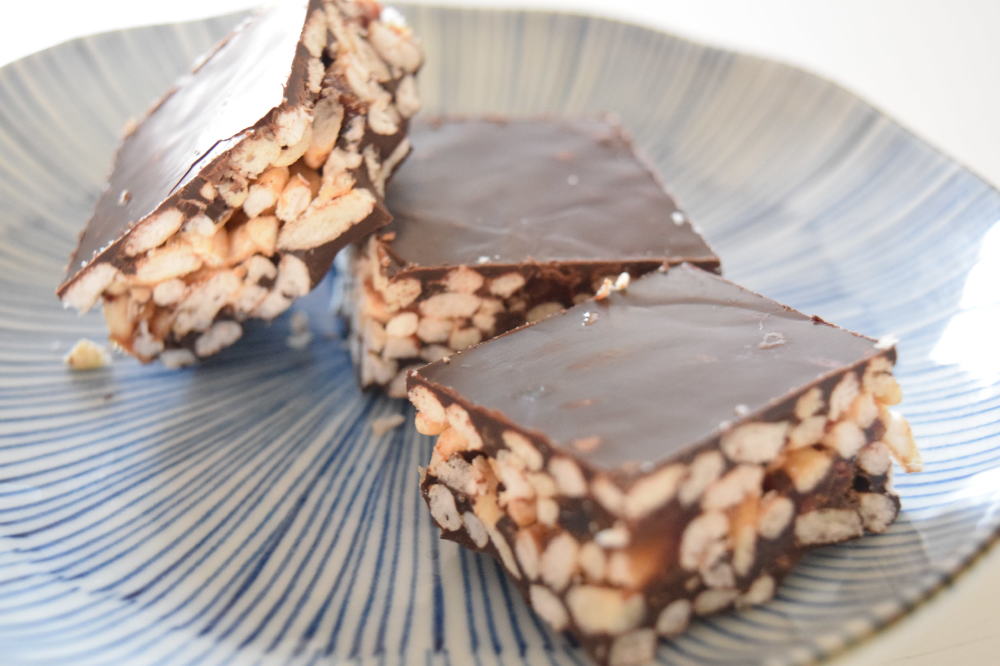
Vegan Crispy Date And Chocolate Bars
The other great thing is that, unlike when I was little, we’re all a bit more aware of catering to food allergies now. These cakes are gluten-free, free of added sugar and dairy-free too. Oh, and unlike most free-from things, they are egg and nut-free too. So with all that stuff that isn’t in them, what is in them? Well it’s very simple – chocolate, dates, puffed rice, coconut oil and a pinch of salt.
Ingredients (makes around 16-20 bars)
275g (9oz) Medjool dates, weigh them without their stones
115g coconut oil
85g (3oz) puffed rice, I like the natures path rice puffs as they are 100% rice with no other ingredients. Be aware that Kellog’s Rice Crispies, while traditional, have added sugar and all sorts of other stuff.
A pinch of sea salt
500g (1lb) chocolate – I use Green and Black’s 70% dark chocolate. Be aware that the lower % chocolates tend to include dairy
Optional – 2-4 tablespoons Grade b pure Maple syrup
To make:
- Line a metal baking pan with foil so that all the sides and bottom are covered. There is no need to grease the foil. I use a tin that is 30x30cm (12 x 12 inch). If you have a bigger tin your bars will be thinner.
- Melt half of your chocolate. I break mine into small pieces then melt it in my microwave. Depending on your microwave this will take 3-5 minutes. Check and shake the chocolate every minute to avoid it over heating. Alternatively, melt it in a bowl sitting on top of a pan with a couple of inches of water below. Make sure the bowl does not touch the water
- Pour the chocolate into your prepared tin. Tilt the tin so that the chocolate spreads over the base evenly. I often use a silicone spatula to finish off the spreading. You will be left with a very thin later of chocolate. Pop the tin into the fridge while you prep the filling
- Finely chop your dates and put them in a saucepan with your coconut oil. Cook them on a medium heat for around 3 minutes. At first they will separate (see photo) but give them a really good stir and as the dates melt they will mix into the fat. Be careful the mixture will be really hot. If you are making this for someone with a sweet tooth, add a couple of tablespoons of honey or maple syrup and stir it in well
- When the date mixture is melted, pour half of the puffed rice into the pan. Give it a really good stir (I use my set of salad servers to do this) so that the rice crispies are covered with the date mixture. Then gradually add the rest of the rice and mix well. It will be pretty dry and look like the photo below.
- Take the tin out of the fridge and pour the date mixture on top of the chocolate. Use the palm of your hand to really press the crispies into the pan. You need them to be really pushed in so that your finished bars won’t fall apart.
- Melt the remaining chocolate and pour it over the crispies. Spread it with a spatula. I like to sprinkle Maldon salt on top of the chocolate for a sweet and salty hit
- Put the tray into the fridge to set up. This usually takes at least 2 hours
- Once it is set, put a chopping board on top of the tray then turn the pan and board so that the pan is sitting bottom side up on the chopping board. The pan should lift right off and the foil should then peel off very easily leaving you with a big slab.
- Get your biggest sharpest knife – this bit is really important because the bigger and sharper it is, the fewer cuts you will need to do and the less crumbling you will have. First cut the slab into long rows then cut the rows across to make square shaped bars. You will have some collateral damage as the odd bar will crumble. These crumbled bits are lovely on ice cream.
- Store the bars in an airtight container or freeze them. They can be eaten from frozen or you can leave them out to defrost.
About Gemma Wade:
Turning her love of cooking into a career, mother of two, Gemma Wade teaches the kitchen secrets to keeping all the parenting plates spinning. Gemma's one-to-one or group led classes, online tutorials and easy recipes demonstrate how to incorporate fuss free, quick and delicious meals into hectic family schedules.
Unlike many chef-led cooking schools, Gemma’s classes and recipes come from the reality of cooking in a home kitchen with small children underfoot and the rest of life being juggled around it.
“Over the years I’ve picked up tons of tips and tricks to get delicious food on the table with a realistic level of effort. Because I spend all my time with real, hard working parents I’ve been able to truly refine what will and won’t work for them. My recipes are inspired by their day-to-day needs, they look and taste amazing but rarely take more than 30 minutes of hands-on work.” Says Gemma. “I’m a big believer in the power of menu planning and the importance of one family, one meal which reduces stress as well as saving money and avoiding waste. I teach based on the principle of cooking with whole, natural ingredients, organic where possible.”
Since launching in 2011 Gemma has had over 5,000 people through her classes, most of which have been busy working mums and dads from companies including, Google, Apple and Facebook.
For more of Gemma’s recipes, online tutorials, or to book a class, visit www.yousaytomatocooking.com or follow @gemcwade